Gates of Hell is a StarCraft II: Wings of Liberty mission.
History
Dangerous Game

In preparation for the assault on Char, Crown Prince Valerian Mengsk not only acquired the pieces of the Keystone, but also took nearly half of the Dominion Fleet as well. Valerian was acting parallel to Emperor Arcturus Mengsk, and neglected to share all the details with his father. Only upon reaching Char did Valerian reveal his intentions to Arcturus: to defeat the Queen of Blades and prove himself a worthy successor.
The emperor was pleasantly surprised by his son's initiative and daring, but doubted whether Valerian had the experience to succeed. On the other hand, Arcturus was unpleasantly surprised to find Valerian had entered into an alliance with Commander Jim Raynor, and Raynor's Raiders. Nonetheless, it was too late for the emperor to recall the expedition.[1]
The Battle
Gaining a Foothold
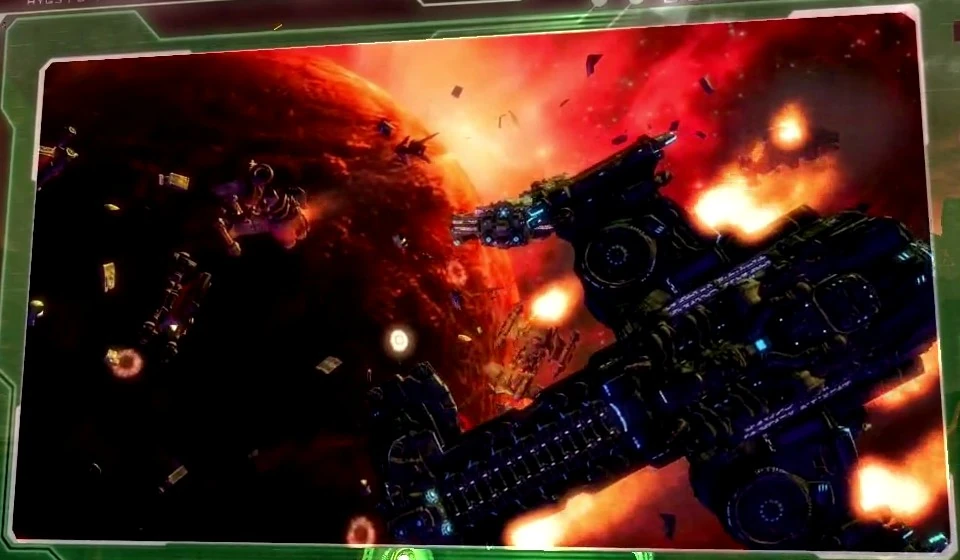

The fleet embattled in orbit
The initial landing was a near disaster. Most battlegroups were destroyed before reaching the surface, and those that survived were badly scattered. The chaos was aggravated by communication difficulties between ground units and higher command.
Raynor took command of his sector and rallied terran forces in reach in order to have a chance to assault the zerg, as terran casualties escalated both in the ground and in orbit. Several Dominion units, continuing to land by drop pod, were rescued by Raynor's Raiders from the zerg and attached themselves to the rebels in the absence of orders.
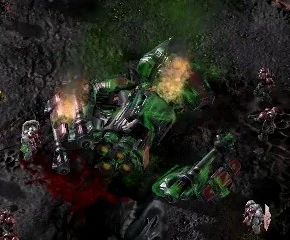
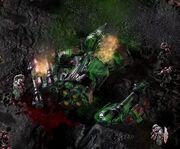
Helios crash landed on Char
As Raynor pulled in troops to secure a perimeter, General Horace Warfield crash landed nearby aboard the battlecruiser Helios. The crew dug in as the zerg pressed in.[2]
Card to Play

The Raiders sortied to relieve the beleaguered battlecruiser. They made it just as the zerg were overrunning the survivors. Raynor and Tychus Findlay personally rescued a wounded Warfield.[3]
Aftermath
- See also: campaign quotations
The terrans had their foothold, but at heavy cost. A push on the main hive was urgently needed before their strength was depleted against the numerically superior zerg.[4][5]
| The next article in this series is Belly of the Beast. |
| The next article in this series is Shatter the Sky. |
Walkthrough
Supply depots are not required for this mission. Over the course of the mission, drop pod "reinforcements" with increasingly powerful units arrive across the map. They become part of the player's army when player units move to their position. The reinforcements may be destroyed by the zerg if not rescued fast enough. Pods continue dropping after Warfield arrives. The final four pods drop in pairs, each arriving at a different location. When one of the pairs is rescued, the other is automatically attacked after a short duration, forcing the player to divide the rescue teams. Rescuing the early pods can help toward reaching the first army-building objective, and bring in production structures.
Every time a drop pod lands, a zerg force assembles between it and the player's base. The player can provoke the zerg into attacking the base's defenses to minimize casualties.
In spite of what is said during the mission, rescuing all pods is very doable. Focus on rescuing as many battlegroups as possible and calling down mercenaries whenever possible. Two bunkers, siege tanks, turrets and either psi disrupters or hive mind emulators on each entrance will hold the base against any major zerg attack. Once a large enough force has been saved it will become gradually easier to clear out the zerg blocking the drop pods.
There are spore cannons scattered around the map. Destroying these yield additional resources.
Destroying the three nydus worms near Warfield's crashed battlecruiser is the final objective. It is substantially defended, but provided the majority of the drop pods are rescued the player will have access to a large enough army to push through. Attack the infested terran base to the southeast, then push north with a ground army. The base has very heavy anti-air defenses, so ensure air units do not get too far ahead of the ground force. Warfield and his troops can survive indefinitely so there's no rush to destroy the worms.
Achievements
| Points |
15 (Final Mission) |
| Criteria |
Complete the mission |
| Edit | |
| Points |
10 (Final Mission) |
| Criteria |
Destroy all spore cannons on Normal difficulty |
| Edit | |
| Points |
10 (Final Mission) |
| Criteria |
Rescue 10 Drop-Pods of Dominion Troops on Hard difficulty |
| Edit | |
Notes
Cut lines from the mission indicate that the spore cannons could be destroyed to receive a gameplay bonus.[6]
References
- ↑ Blizzard Entertainment. StarCraft II: Wings of Liberty. (Activision Blizzard). PC. Cinematic: Dangerous Games. (in English). 2010.
- ↑ Blizzard Entertainment. StarCraft II: Wings of Liberty. (Activision Blizzard). PC. Mission: Wings of Liberty, Gates of Hell (in English). 2010-07-27.
- ↑ Blizzard Entertainment. StarCraft II: Wings of Liberty. (Activision Blizzard). PC. Cinematic: Card To Play. (in English). 2010.
- ↑ Blizzard Entertainment. StarCraft II: Wings of Liberty. (Activision Blizzard). PC. Tychus Findlay (in English). 2010.
- ↑ Blizzard Entertainment. StarCraft II: Wings of Liberty. (Activision Blizzard). PC. Conversations after Gates of Hell (in English). 2010
- ↑ 2014-08-30, Unused HoTS Story Elements. StarCraft Legacy, accessed on 2014-09-01